Finding Suppliers on Alibaba for Amazon FBA: A Practical, Risk-Aware Guide for US Sellers
Finding the right supplier is one of the most decisive steps in building a profitable Amazon FBA business. A strong product idea can fail entirely due to poor manufacturing quality, missed deadlines, or compliance issues – all of which often trace back to supplier selection.
Finding the right supplier is a key step in bringing your Amazon product idea to life – if you need help before sourcing, start with our guide on how to find profitable products on Amazon to make sure your idea is worth pursuing.
Alibaba remains the world’s largest B2B sourcing platform and a primary gateway for Amazon FBA sellers sourcing private-label products. However, success on Alibaba is not about finding the cheapest supplier – it’s about finding a reliable, compliant, and scalable manufacturing partner.
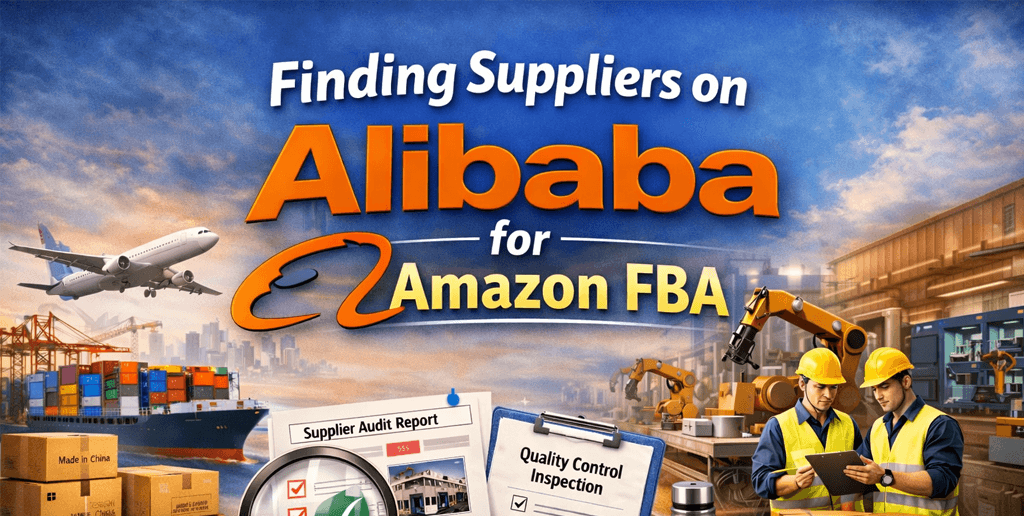
This guide explains how experienced Amazon sellers actually use Alibaba, what to look for beyond surface-level metrics, and how to reduce sourcing risks before you send your first wire transfer.
Why Alibaba Is Still the Go-To Platform for Amazon FBA Sellers
Alibaba connects US sellers with manufacturers primarily based in China, Vietnam, India, and other manufacturing hubs. Its scale is unmatched, but so is the variability in quality.
Why sellers still use Alibaba:
- Direct access to factories (not just trading companies)
- Competitive pricing due to manufacturing density
- Ability to customize products and packaging
- Built-in tools like Trade Assurance and verified supplier profiles
Why sellers struggle:
- Fake factories posing as manufacturers
- Misleading certifications
- Communication gaps
- Quality inconsistency between samples and production runs
The key is learning how to filter signal from noise. Before you begin supplier outreach, make sure you have a solid product concept – learn how to find your first product to sell on Amazon if you haven’t already.
Step 1: Define Your Supplier Requirements Before You Search
Most sourcing mistakes happen before contacting suppliers. Sellers jump into Alibaba with only a product idea and price target, which invites low-quality suppliers.
Before searching, define:
Product & Manufacturing Requirements
- Material specifications (not just “plastic” or “metal”)
- Target unit cost with margin for Amazon fees
- Customization needs (logo, packaging, inserts)
- Estimated monthly order volume (now and 6 – 12 months later)
Amazon-Specific Requirements
- FNSKU labeling capability
- Polybag, suffocation warnings, carton labeling
- Experience shipping to Amazon FBA warehouses
- Knowledge of US compliance standards (FDA, CPSIA, FCC, etc.)
Suppliers who cannot answer these questions clearly are unlikely to be long-term partners.
Supplier pricing is not your only cost – don’t forget to factor Amazon’s referral and fulfillment charges using our fee breakdown and calculator.
Step 2: How to Search Alibaba Like an Experienced Seller
Use Product-Specific Keywords (Not Broad Terms)
Avoid generic searches like “kitchen tool“, “school supplies” or “fitness product”. Instead, use:
- Material + function (e.g., “stainless steel garlic press”)
- Industry terms (OEM, ODM)
- Certification keywords (FDA silicone, BPA-free)
Apply Smart Filters
Focus on:
- Gold Supplier status (5+ years preferred)
- Trade Assurance enabled
- Verified supplier
- Factory location consistency (factory address ≠ office address)
These filters do not guarantee quality – but they reduce obvious risk.
Step 3: Manufacturer vs Trading Company (And Why It Matters)
Many Alibaba listings labeled “Manufacturer” are actually trading companies.
How to Identify a Real Factory
Ask direct questions:
- Can I see photos of your production line?
- How many workers are on your factory floor?
- What percentage of your business is OEM vs ODM?
Check:
- Business license scope (manufacturing vs export trading)
- Factory audit reports (SGS, TÜV, BV)
- Consistency between product range and factory specialization
When trading companies make sense:
If you’re ordering small quantities or combining products from multiple factories, a reputable trading company can still be viable – but margins will be tighter.
Step 4: Evaluating Supplier Credibility Beyond Alibaba Badges
Alibaba badges are a starting point – not proof.
Key Signals of a High-Quality Supplier
- Clear, detailed responses (not copy-paste replies)
- Willingness to discuss process limitations
- Proactive questions about your Amazon requirements
- Transparent MOQ and pricing structure
Red Flags to Watch For
- Reluctance to provide samples
- Unrealistically low pricing
- Overpromising delivery timelines
- Poor English isn’t a dealbreaker – poor clarity is
Experienced sellers prioritize communication quality over speed.
Prioritize ideas that meet key criteria like demand score, competition, and profitability – read more about product evaluation criteria in our guide on what makes a winning product.
Step 5: Sampling Strategy (Where Most Sellers Cut Corners)
Never rely on one sample.
Best-Practice Sampling Process
- Request multiple samples from different suppliers
- Order pre-production samples (PPS), not showroom samples
- Test:
- Material durability
- Dimensions and tolerances
- Packaging integrity
- Branding accuracy
For higher-risk products, consider third-party inspection even at the sample stage.
After sourcing potential suppliers, the next key step is to validate product ideas before investing so you don’t order inventory for products with weak demand.
Step 6: Negotiating Price Without Sacrificing Quality
Aggressive price negotiation often backfires.
Instead of pushing for the lowest unit cost:
- Negotiate payment terms (30/70, 50/50)
- Optimize packaging to reduce shipping costs
- Ask for cost breakdown transparency
- Lock pricing tiers based on volume milestones
A supplier who survives on razor-thin margins is more likely to cut corners later.
Once you’ve identified credible suppliers, learn how to negotiate better pricing and terms with manufacturers to improve your margins.
Step 7: Quality Control and Pre-Shipment Inspections
Amazon returns are expensive. Quality control protects your brand – not just your inventory.
Minimum QC Checklist
- Pre-production inspection
- During production check (for large orders)
- Pre-shipment inspection (PSI)
Use independent inspection agencies – not supplier-recommended inspectors.
Step 8: Compliance, Certifications, and US Import Risks
US sellers are legally responsible for product compliance.
Depending on your product, this may include:
- FDA registration (food contact items)
- CPSIA testing (children’s products)
- FCC compliance (electronics)
- Prop 65 (California)
Never assume certificates are valid.
Request test reports and verify issuing labs independently.
Step 9: Shipping to Amazon FBA (What Suppliers Often Get Wrong)
Confirm:
- Carton dimensions and weight limits
- Palletization requirements (if applicable)
- FNSKU placement
- Correct Amazon warehouse labeling
Many sellers lose weeks due to minor labeling mistakes. Whether you plan to use FBA or self-fulfill affects how you order and package products – explore the differences in Amazon FBA vs FBM.
Building Long-Term Supplier Relationships
The most profitable Amazon brands don’t “shop” for suppliers every year – they build partnerships.
Long-term benefits include:
- Priority production slots
- Better payment terms
- Lower MOQs on new SKUs
- Early access to product improvements
Consistency and professionalism matter as much as order volume.
Final Thoughts: Alibaba Is a Tool – Not a Strategy
Alibaba does not create successful Amazon businesses.
Disciplined sourcing decisions do.
Sellers who treat supplier selection as a strategic process – not a price hunt – build stronger brands, reduce returns, and scale faster.
If you approach Alibaba with clear requirements, verification discipline, and Amazon-specific knowledge, it becomes one of the most powerful leverage points in your FBA business.
About SwanseaAirport
SwanseaAirport provides in-depth tools, guides, and market insights for Amazon and Walmart sellers. Our content is written for operators – not hobbyists – focused on long-term profitability, compliance, and scalable execution.
Frequently Asked Questions
Amazon Product Criteria: What Makes a Winning Product
Choosing the right product is the single most important decision an Amazon seller makes. Pricing, advertising, branding, and optimization all matter – but none of them can save a fundamentally weak product.
Choosing products with strong sales potential is at the heart of building a thriving Amazon business. If you’re new to selling, begin with our Amazon Seller Guides hub for full context on every stage of the seller process.
At SwanseaAirport, we’ve analyzed thousands of listings, category trends, and seller case studies across Amazon and Walmart. One pattern is consistent: winning products follow a clear, repeatable set of criteria, while failing products almost always violate at least one of them.
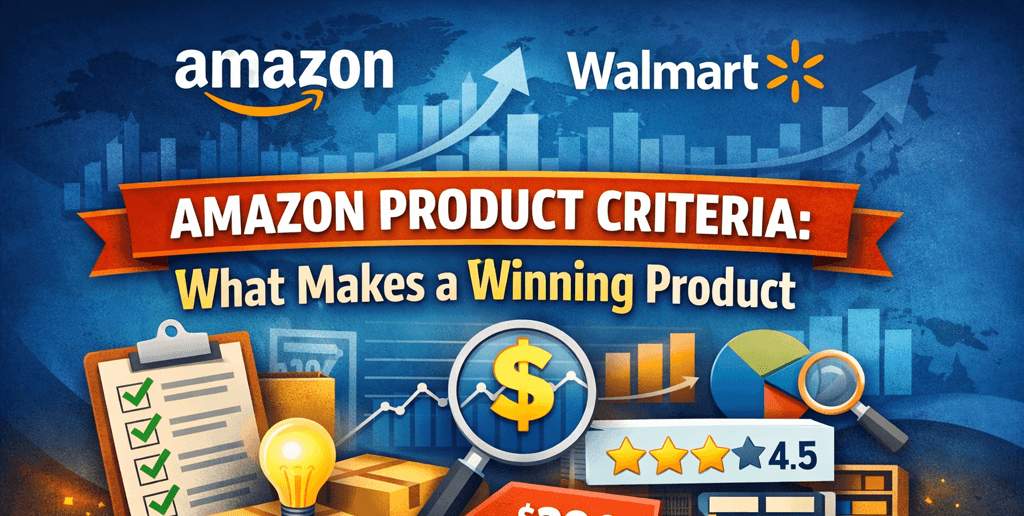
This guide breaks down what actually makes an Amazon product profitable and scalable in today’s marketplace, based on real seller behavior, marketplace mechanics, and operational realities – not theory or recycled advice.
What Winning Really Means on Amazon
A winning Amazon product is not just one that sells.
A winning product:
- Generates consistent profit, not just revenue
- Can be defended against competitors
- Scales without operational chaos
- Survives Amazon fee changes, ad inflation, and copycats
- Builds long-term seller account health
In other words, it works today and tomorrow.
Before applying criteria, you need a list of candidates – start with our guide on how to find your first product to sell on Amazon.
1. Sufficient Demand (But Not Hype-Driven Demand)
The Right Kind of Demand
Strong demand is necessary – but viral or trend-driven demand is often a trap.
Winning products usually have:
- Evergreen demand (used year-round or seasonally predictable)
- Clear use cases
- Repeat buyer potential
Avoid products that:
- Depend on short-term social media trends
- Spike sharply then decline
- Require constant influencer promotion to move inventory
Expert insight:
If a product’s demand graph looks like a heartbeat monitor, it’s usually not stable enough for private-label sellers.
2. Price Point That Supports Profit After Ads
Many new sellers focus on selling price alone. Experienced sellers focus on net margin after advertising.
Ideal Price Range (General Guideline)
- $20 – $60 retail price
- Allows room for:
- Amazon referral + Amazon FBA fees
- PPC (often 15 – 30% of revenue)
- Returns and refunds
- Profit margin of 20%+
Products priced too low force you to win on volume and ads. Products priced too high increase return risk and customer skepticism unless strongly branded.
Don’t forget to factor in fees – use our Amazon seller fees breakdown and calculator to model your true margins.
3. Manageable Competition (Not Just Low Competition)
Low competition doesn’t always mean opportunity. Often, it means low demand or hidden complexity.
Instead, look for:
- Listings with weak branding or poor images
- Low review quality (not just low review count)
- Incomplete bullet points or unclear value propositions
Red flags:
- Dozens of nearly identical listings with 5,000+ reviews
- Aggressive price wars
- Heavy brand dominance (Nike, Apple, Shark, etc.)
Winning strategy:
Compete where sellers are lazy – not where they’re unbeatable.
4. Clear Differentiation Potential
If your product can’t be meaningfully different, Amazon turns it into a commodity.
Winning products allow differentiation through:
- Design improvements
- Bundles or kits
- Better materials
- Improved sizing or packaging
- Solving a known customer complaint
Ask:
Can I clearly explain why my product is better in one sentence?
If not, customers won’t see the difference either.
5. Low Complexity and Low Risk
Many sellers underestimate how operational complexity kills profit.
Safer Product Characteristics
- No electronics or batteries
- No liquids, creams, or perishables
- No moving parts
- No sizing ambiguity that causes returns
Avoid products that:
- Break easily
- Require instructions customers won’t read
- Invite “used and returned” abuse
Operational reality:
Amazon punishes complexity with returns, negative feedback, and suppressed listings.
After applying product criteria, the next essential step is to validate product ideas before investing to confirm real demand.
6. Lightweight and Compact (FBA Economics Matter)
Amazon’s fee structure rewards small, light products.
Winning products often:
- Weigh under 2 lbs
- Fit into standard-size FBA tiers
- Stack efficiently in cartons
Large or heavy items:
- Increase storage and shipping fees
- Raise return costs
- Limit pricing flexibility
A product can be profitable on paper and still fail due to FBA economics.
7. Review Landscape You Can Realistically Compete In
Reviews aren’t just social proof – they’re conversion multipliers.
A healthy niche usually shows:
- Mixed review quality (not perfect)
- Repeated complaints you can fix
- Review counts under 1.000 for top sellers (category dependent)
Be cautious if:
- Top listings have tens of thousands of reviews
- Customers expect brand-level trust
- Review velocity is extremely high
Advanced insight:
Fixing a specific 1 – 2 star complaint is more powerful than adding generic features.
8. Compliance, Safety, and Category Restrictions
Many sellers fail after launch due to compliance issues.
Before sourcing, verify:
- Category gating requirements
- Testing or certification needs (FDA, FCC, CPSIA, etc.)
- Trademark conflicts
- Claim restrictions (medical, therapeutic, eco-friendly)
Winning products are:
- Easy to document
- Low regulatory risk
- Unlikely to trigger listing takedowns
Amazon favors sellers who don’t create risk for the marketplace.
9. Supply Chain Stability
A product is only winning if you can reorder confidently.
Evaluate:
- Supplier reliability
- Lead times
- MOQ flexibility
- Material availability
Products with:
- Single-source suppliers
- Volatile raw materials
- Long production cycles
introduce cash flow and stockout risks that crush momentum.
10. Long-Term Brand Expansion Potential
The best products are entry points, not endpoints.
Winning products:
- Fit into a broader product line
- Share a customer avatar
- Support brand storytelling
- Allow upsells and bundles
This matters because:
- Brands get higher valuations
- Ads become more efficient across SKUs
- Amazon increasingly rewards brand depth
The SwanseaAirport Product Viability Test
Before committing to any product, we recommend asking:
- Can I profit after ads?
- Can I clearly differentiate?
- Can I handle returns and support?
- Can I reorder without stress?
- Can this product support a brand – not just a listing?
If the answer to any of these is no, it’s not a winning product yet.
Final Thoughts: Product Selection Is Strategy, Not Guesswork
Most Amazon failures don’t happen because sellers didn’t try hard enough.
They fail because the product was flawed from the start.
Winning products sit at the intersection of:
- Demand
- Differentiation
- Operational simplicity
- Financial sustainability
When you choose correctly, everything else – SEO, ads, branding – works with you instead of against you.
At swanseaairport, we believe smart product criteria beat hustle every time.
Frequently Asked Questions
How to Find Profitable Products on Amazon
Finding profitable products on Amazon is not about chasing trends or copying what already exists. It’s about understanding market demand, competition dynamics, cost structures, and long-term brand potential – and then making data-backed decisions that reduce risk.
Understanding product profitability is a key milestone in your Amazon selling journey. If you’re new, start with our Amazon Seller Guides hub to get oriented on the full setup and launch process.
At SwanseaAirport, we’ve analyzed thousands of Amazon listings, seller accounts, and marketplace trends. This guide distills that experience into a repeatable, professional product research framework used by serious Amazon sellers – not shortcuts or hype.
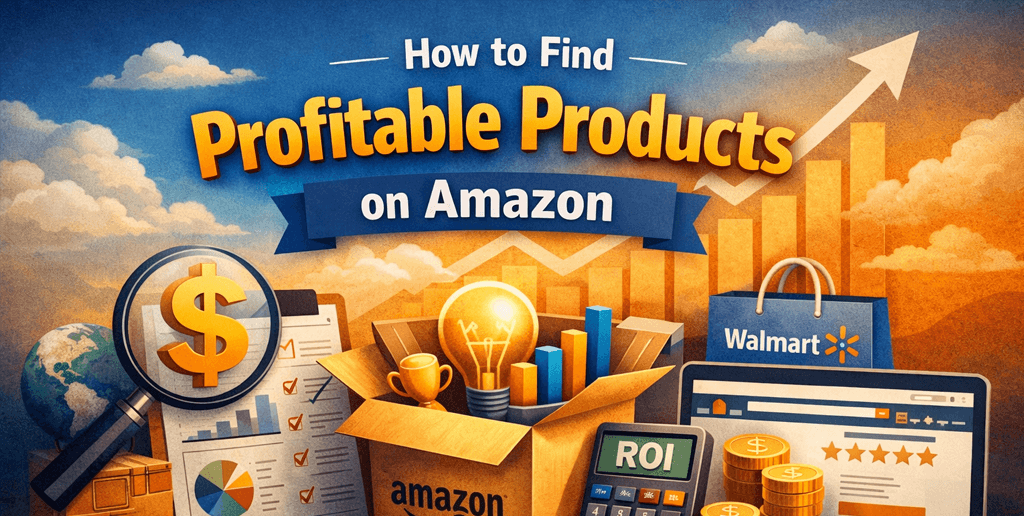
Whether you’re launching your first product or expanding an existing brand, this guide will show you how to identify products that sell consistently, scale predictably, and protect your margins.
What Profitable Really Means on Amazon (Beyond Revenue)
Many beginners define profitable products by monthly revenue alone. That’s a mistake.
A truly profitable Amazon product must meet four conditions:
- Sustainable demand (not seasonal hype)
- Manageable competition (room for differentiation)
- Healthy net margins (after all Amazon fees)
- Operational simplicity (low risk, low complexity)
A product making $50.000/month with 8% net margin is often worse than a $15.000/month product at 30% margin – especially once PPC costs rise.
Key Insight: Profitability on Amazon is about defensibility, not just sales velocity.
Before you can assess profitability, you first need to find product opportunities. If you want help starting from idea generation, see our guide on how to find your first product to sell on Amazon.
Step 1: Start With Demand That Already Exists
Amazon is a demand-driven marketplace. You are not creating demand – you are intercepting it.
How to Validate Real Demand
Instead of guessing, look for buyer behavior signals:
- Multiple listings with 300 – 2,000 monthly reviews
- Consistent Best Seller Rank (BSR), not sharp spikes
- Listings with ongoing reviews (weekly or daily)
Avoid:
- Products with sudden ranking jumps (often driven by promotions)
- Viral social media products with unstable demand
Rule of Thumb: If at least 5 sellers are making steady sales without dominating the category, demand is proven.
Step 2: Analyze Competition the Right Way (Not Just Review Counts)
Most guides say “avoid products with too many reviews”. That’s incomplete.
What Actually Signals Weak Competition
Look for listings that show seller weaknesses, such as:
- Poor or incomplete images
- Generic bullet points
- Confusing titles
- Low review ratings (<4.3 stars)
- Frequent complaints about the same issue
These gaps represent opportunities to out-execute, not reasons to avoid the niche.
Red Flags You Should Avoid
- Listings dominated by one brand with 50%+ market share
- Heavy brand recognition (off-Amazon presence)
- Patent-protected designs or trademarks
Professional Tip: You don’t need low competition – you need beat-able competition.
Step 3: Calculate True Profit (Most Sellers Don’t)
Many sellers underestimate costs, especially in the U.S. market.
Include Every Cost:
- Product manufacturing
- Shipping (including peak season surcharges)
- Amazon FBA fees
- Referral fees
- Storage fees
- PPC (assume 15 – 30% of revenue)
- Returns and refunds
- Software tools
Target Benchmarks:
- Minimum net margin: 25%
- Ideal landed cost: range from 25 – 30% of selling price
- Selling price sweet spot: $20 – $60
Lower-priced products struggle with ad costs; higher-priced products face slower conversion.
In addition to profitability data, make sure you validate product ideas before investing to confirm real demand and sales velocity.
Step 4: Avoid High-Risk Product Categories
Even profitable products can fail due to compliance or operational issues.
Categories That Increase Risk:
- Electronics (high returns, certifications)
- Supplements (FDA scrutiny, liability)
- Fragile items (glass, liquids)
- Products for babies or medical use
Beginner-Friendly Categories:
- Home & Kitchen
- Office products
- School supplies
- Pet accessories (non-consumable)
- Sports & outdoors (non-technical)
- Automotive accessories (non-electronic)
Long-term sellers optimize for risk-adjusted profit, not just margin.
Profit margins are only one part of the story – you need a framework to identify winning product characteristics. Learn more in our guide on what makes a winning product.
Step 5: Look for Differentiation Before You Source
The biggest mistake is sourcing before differentiating.
Differentiation Can Be:
- Improved materials
- Added accessories or bundles
- Better sizing or usability
- Clearer instructions
- Premium packaging
- Solving the #1 complaint in reviews
Before contacting suppliers, you should already know:
- What problem customers complain about
- How your version solves it
- Why your product deserves a higher conversion rate
If you cannot explain your differentiation in one sentence, you don’t have one.
Step 6: Validate With Numbers, Not Emotions
Before committing inventory, sanity-check your idea:
Ask yourself:
- Can I realistically rank for page one?
- Can I afford aggressive PPC for 60 – 90 days?
- Can I improve this product again in version 2?
- Can this product support a brand expansion?
Products that pass these questions tend to scale, not just launch.
Many sellers leverage advanced software for product screening – see how top tools stack up in our best Amazon product research tools comparison.
Step 7: Think Like a Brand Owner, Not a Product Hunter
The most profitable Amazon sellers don’t chase single products – they build brand ecosystems.
Signs a Product Can Become a Brand:
- Multiple variations possible
- Cross-sell opportunities
- Repeat customer potential
- Off-Amazon audience appeal
A product that leads to 3–5 related SKUs is far more valuable than a standalone winner.
Common Myths About Amazon Product Research
Myth: Low reviews mean easy sales
Reality: Low reviews often mean low demand or poor execution.
Myth: Tools find winning products
Reality: Tools provide data; analysis creates profit.
Myth: Copy what’s selling
Reality: Copycats race to the bottom.
Final Thoughts: Profit Comes From Process, Not Luck
Finding profitable products on Amazon is not about secrets – it’s about structured decision-making.
Sellers who succeed long-term:
- Analyze markets deeply
- Respect costs and risks
- Focus on customer experience
- Build defensible brands
At SwanseaAirport, we believe profitable Amazon businesses are built through clarity, discipline, and execution, not shortcuts.
If you would bookmark, share, or reference this guide later – that’s intentional. This is the same framework used by sellers who treat Amazon as a real business, not a side hustle.
Frequently Asked Questions
Best Amazon Product Research Tools (Helium 10 vs Jungle Scout vs AMZScout)
Choosing the right Amazon product research tool can determine whether you launch a profitable product – or waste months chasing misleading data. While dozens of tools promise “winning products”, three platforms consistently dominate serious seller conversations in the US market: Helium 10, Jungle Scout, and AMZScout.
Choosing the right product research tool is essential once you’ve learned how to find and validate product ideas. If you need help with the foundational steps before tool selection, start with our guide on how to find profitable products on Amazon or Amazon Seller Guides.
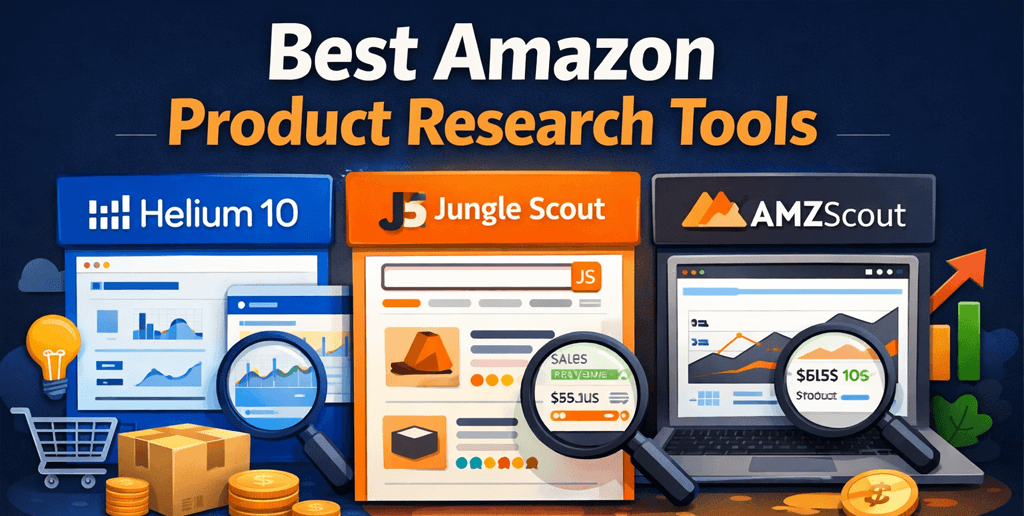
This guide goes beyond surface-level feature lists. Drawing on real seller workflows, data accuracy considerations, and practical use cases, we compare Helium 10 vs Jungle Scout vs AMZScout to help you decide which tool actually fits your Amazon business model in 2026.
Why Product Research Tools Matter More Than Ever
Amazon’s marketplace is no longer forgiving. Saturated niches, rising PPC costs, and sophisticated competitors mean gut instinct is no longer enough.
A reliable product research tool helps you:
- Validate real customer demand (not hype)
- Estimate monthly sales and revenue with confidence
- Identify over-saturated vs under-served niches
- Analyze competitor pricing, reviews, and listing strength
- Reduce launch risk before investing in inventory
However, not all tools are built for the same type of seller. That’s where most comparisons fall short.
These databases and keyword platforms help you uncover high-potential ideas – a critical step described in detail in our guide on how to find your first product to sell on Amazon.
Evaluation Criteria (How We Compared These Tools)
To avoid shallow or promotional analysis, this comparison is based on:
- Data accuracy & reliability (sales estimates vs real outcomes)
- Depth of research features (not just product discovery)
- Usability for US-based sellers
- Scalability (beginner → advanced brand)
- Value for money based on real workflows
- Transparency in metrics and assumptions
While tools provide data, you still need the right product criteria to interpret results. See our guide on what makes a winning product to sharpen your filters.
Helium 10: The Most Comprehensive Amazon Research Suite
Best for: Advanced sellers, private label brands, and data-driven operators
Strength: All-in-one ecosystem with deep analytics
What Helium 10 Does Exceptionally Well
Helium 10 is not just a product research tool – it’s a full Amazon business operating system. Its strength lies in how multiple tools connect into a single workflow.
Key research features include:
- Black Box – Advanced product discovery with granular filters (price, revenue, review velocity, fulfillment type)
- Xray – Chrome extension for instant niche validation
- Trendster – Seasonal demand and historical trend analysis
- Profitability Calculator – Realistic FBA fee breakdowns
What sets Helium 10 apart is data triangulation. You’re rarely relying on one metric alone. For example, sellers can cross-check estimated revenue, search volume, and historical demand before making inventory decisions.
Limitations to Consider
- Interface can feel overwhelming for beginners
- Higher price point compared to competitors
- Overkill for sellers only doing basic wholesale or arbitrage
Verdict on Helium 10
If you’re building a long-term Amazon brand, Helium 10 offers the deepest insight and best long-term value. It’s particularly strong for sellers who want confidence before committing capital.
For a detailed breakdown of features and pricing, see our full Helium10 review.
Jungle Scout: The Gold Standard for Beginners and Product Validation
Best for: New sellers, first-product launches, educators
Strength: Simplicity, clean UI, and intuitive metrics
Why Jungle Scout Is Still So Popular
Jungle Scout earned its reputation by making product research accessible and understandable. It’s often the first serious tool new US sellers use – and for good reason.
Standout features include:
- Product Database – Fast niche scanning with clean filters
- Opportunity Finder – Demand vs competition scoring
- Sales Estimator – Easy-to-interpret monthly estimates
- Supplier Database – Useful for early sourcing ideas
Jungle Scout excels at reducing analysis paralysis. Instead of overwhelming users with data, it highlights what matters most when validating a first product.
Where Jungle Scout Falls Short
- Less advanced keyword and trend analysis than Helium 10
- Limited customization for power users
- Fewer tools beyond product discovery and validation
Verdict on Jungle Scout
Jungle Scout remains one of the best tools for launching your first Amazon product. If you value clarity over complexity and want to avoid rookie mistakes, it’s an excellent starting point.
AMZScout: Budget-Friendly Research with Solid Core Data
Best for: Budget-conscious sellers, testers, side hustlers
Strength: Affordable access to core research metrics
What AMZScout Gets Right
AMZScout focuses on the essentials: product demand, competition, and pricing – without the premium cost.
Core features include:
- Product Database and Chrome Extension
- Sales and revenue estimates
- Basic keyword insights
- Competitive analysis metrics
For sellers testing Amazon as a side business or validating ideas before upgrading tools, AMZScout provides surprisingly reliable data at a lower price point.
Trade-Offs to Know
- Fewer advanced analytics and integrations
- Limited ecosystem compared to Helium 10
- Less robust support and education resources
Verdict on AMZScout
AMZScout is ideal if you want accurate basics without a large monthly commitment. It’s not designed for scaling brands – but it’s honest, functional, and cost-effective.
If you’d like more insight into data accuracy and niche scoring, check out our AMZScout review.
Side-by-Side Comparison Summary
| Feature | Helium 10 | Jungle Scout | AMZScout |
|---|---|---|---|
| Best For | Advanced sellers | Beginners | Budget users |
| Data Depth | ⭐⭐⭐⭐⭐ | ⭐⭐⭐⭐ | ⭐⭐⭐ |
| Ease of Use | ⭐⭐⭐ | ⭐⭐⭐⭐⭐ | ⭐⭐⭐⭐ |
| Keyword Research | Advanced | Moderate | Basic |
| Trend Analysis | Yes | Limited | No |
| Pricing Tier | High | Medium | Low |
Which Tool Is Best for You?
Choose Helium 10 if:
- You plan to build a long-term Amazon brand
- You rely heavily on data before investing
- You want one platform for research, keywords, and optimization
Choose Jungle Scout if:
- You’re launching your first product
- You want clear signals without complexity
- You value simplicity and speed
Choose AMZScout if:
- You’re testing Amazon with minimal upfront cost
- You need basic validation, not enterprise analytics
- You prefer lean tools over feature-heavy platforms
Once you uncover potential opportunities with these tools, the next step is to validate product ideas before investing rather than rely solely on data.
Expert Insight from SwanseaAirport
At SwanseaAirport, we’ve reviewed dozens of Amazon tools across private label, wholesale, and Walmart sellers. One consistent finding stands out:
The best product research tool is the one that matches your stage – not the one with the most features.
Many failed launches come not from bad tools, but from using advanced tools too early or basic tools too long. Smart sellers upgrade their stack as their business matures.
Final Thoughts: No Tool Replaces Judgment
Helium 10, Jungle Scout, and AMZScout all provide valuable insights – but none guarantee success. Real profitability comes from combining data with market intuition, customer understanding, and disciplined execution.
Before leveraging advanced tools, make sure you’re grounded in the basics – see our guide on how to start selling on Amazon in 2026.
If this were a printed business guide or reference manual, these are exactly the tools you’d expect to see discussed – not because they’re trendy, but because they’ve stood the test of real seller use.
If you’re serious about selling on Amazon in the US market, investing in the right research tool at the right time is no longer optional – it’s foundational.
Frequently Asked Questions
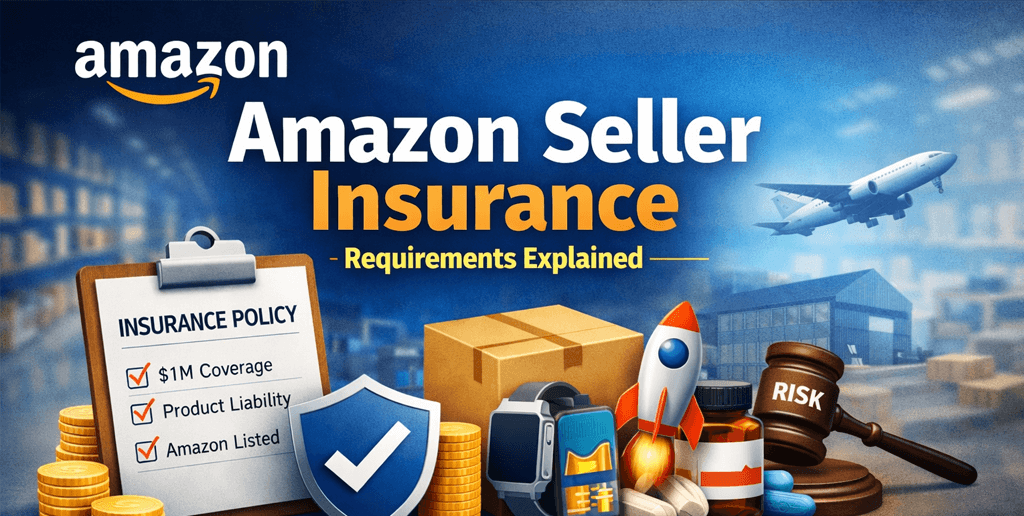
Amazon Seller Insurance Requirements Explained (2026 Guide for US Sellers)
Selling on Amazon offers access to millions of customers – but it also comes with legal and financial responsibilities that many sellers underestimate. One of the most misunderstood (and frequently mismanaged) requirements is Amazon seller insurance.
This guide explains exactly when Amazon requires insurance, what type of policy you need, how enforcement works, and how to avoid costly mistakes that can put your Amazon Seller Central account at risk. It’s written for US-based Amazon sellers, from early-stage private label brands to established FBA businesses.
If you’ve ever wondered whether insurance is really mandatory – or how to get compliant without overpaying – this article is for you.
Why Amazon Requires Seller Insurance
Amazon’s insurance requirement is not arbitrary. It exists to manage product liability risk across a marketplace with millions of third-party sellers.
When a customer is injured or experiences property damage from a product sold on Amazon, claims often involve:
- The seller
- The manufacturer
- Amazon itself
To reduce its own legal exposure, Amazon requires certain sellers to carry commercial general liability insurance that explicitly names Amazon.com Services LLC as an additional insured.
In short:
👉 If your product causes harm, Amazon wants assurance that claims can be paid – without Amazon footing the bill.
When Amazon Seller Insurance Is Required
Amazon does not require every seller to have insurance from day one.
You are required to carry insurance only when all of the following are true:
1. You sell on Amazon.com (US marketplace)
This requirement applies specifically to the US marketplace. Other regions have separate rules.
2. Your gross sales exceed $10.000 in any rolling 3-month period
Once you cross this threshold – even temporarily – you are required to comply.
Important: Amazon tracks this automatically. There is no grace period once notified.
3. Amazon sends you a formal insurance request
You’ll receive a notification in Seller Central → Performance → Account Health.
Failing to respond can result in:
- Listing suppression
- Account suspension
- Removal of buy box eligibility
What Type of Insurance Amazon Requires
Amazon does not accept just any business insurance. Your policy must meet specific technical criteria.
Required Policy Type: Commercial General Liability (CGL)
Your policy must include coverage for:
- Product liability
- Bodily injury
- Property damage
- Personal and advertising injury
Minimum Coverage Limits
- $1.000.000 per occurrence
- $1.000.000 aggregate per year
Higher-risk categories (e.g., supplements, electronics, children’s products) may warrant higher limits, even if Amazon doesn’t explicitly require them.
Amazon’s Additional Insured Requirement (Critical Detail)
Your policy must list Amazon as an Additional Insured using this exact wording (or extremely close):
Amazon.com Services LLC and its affiliates and assignees
This is non-negotiable.
Common Mistake:
Many sellers purchase insurance but forget to:
- Add Amazon as additional insured
- Upload the certificate correctly
Result: Non-compliance, even though you technically have insurance.
Products That Carry Higher Insurance Risk
While Amazon applies the same baseline requirement across categories, some products are far more likely to trigger claims.
High-risk categories include:
- Dietary supplements and food
- Cosmetics and skincare
- Electronics and batteries
- Toys and children’s products
- School supplies
- Home goods with moving parts
- Fitness equipment
If you sell in these categories, insurance isn’t just about Amazon compliance – it’s about business survival.
FBA vs FBM: Does Fulfillment Method Matter?
Short answer: No.
Whether you use:
- FBA (Fulfillment by Amazon)
- FBM (Fulfilled by Merchant)
You are still considered the seller of record and remain legally responsible for the product. You can read Amazon FBA vs FBM: Complete comparison to know more about FBA and FBM.
Many FBA sellers mistakenly believe Amazon’s logistics shield them from liability. They don’t.
How Amazon Verifies Insurance Compliance
Amazon does not manually review every policy line by line – but it does check:
- Coverage type
- Coverage limits
- Policy expiration date
- Additional insured language
- Consistency with seller legal name
Once approved, Amazon may re-request documentation annually or after major account changes.
What Happens If You Don’t Comply?
Failure to meet insurance requirements can lead to escalating enforcement:
- Account health warning
- Listing deactivation
- Account suspension
Amazon rarely negotiates timelines once enforcement begins.
How Much Does Amazon Seller Insurance Cost?
For most US Amazon sellers:
- $25 – $60 per month for standard private label products
- Higher for supplements, electronics, or high revenue brands
Factors that affect pricing:
- Annual revenue
- Product category
- Claims history
- Domestic vs imported goods
Cheap insurance that doesn’t meet Amazon’s requirements is more expensive in the long run.
How to Choose the Right Insurance Provider
When evaluating insurance providers, don’t just ask “Is this Amazon-compliant?”
Ask:
- Do they understand Amazon marketplace sellers?
- Will they issue certificates quickly?
- Can they easily add Amazon as additional insured?
- Do they scale with revenue growth?
A policy that becomes invalid as your sales grow creates recurring compliance risk.
Do New Amazon Sellers Need Insurance Immediately?
No – but waiting until Amazon notifies you is risky.
Proactive insurance makes sense if:
- You’re scaling ads aggressively
- You sell regulated or high-risk products
- You plan to exceed $10.000/month quickly
Insurance is easier to secure before a claim or enforcement action occurs.
Common Myths About Amazon Seller Insurance
Myth 1: Amazon covers liability for FBA sellers
False. Amazon may assist in certain cases, but liability remains with the seller.
Myth 2: A general business policy is enough
False. Many general policies exclude product liability.
Myth 3: Insurance is only for big sellers
False. Claims often target smaller brands with fewer legal defenses.
Expert Insight: Why Insurance Is a Growth Tool, Not Just a Requirement
Experienced Amazon operators view insurance as:
- A prerequisite for brand scaling
- Protection against catastrophic loss
- A signal of operational maturity
Insurance doesn’t slow growth – it protects it.
Final Thoughts: Treat Insurance as Part of Your Amazon Infrastructure
Amazon seller insurance isn’t just a checkbox – it’s part of running a legitimate ecommerce business in the US.
If you:
- Sell physical products
- Control branding or packaging
- Intend to scale beyond hobby level
Then insurance isn’t optional—it’s foundational.
At SwanseaAirport, we recommend treating compliance proactively, not reactively. Sellers who build with protection in place grow faster, safer, and with fewer disruptions.
Frequently Asked Questions
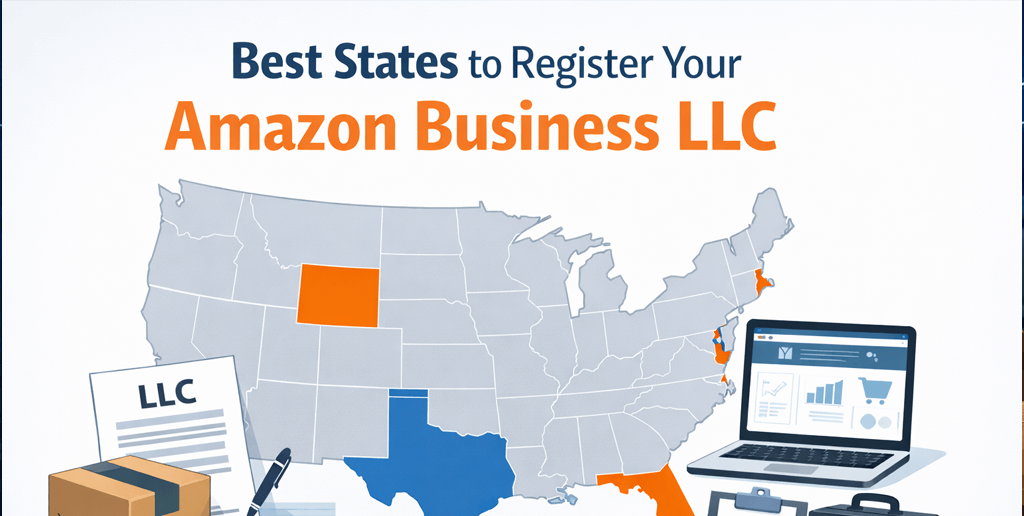
Best States to Register Your Amazon Business LLC
Choosing the right state to register your Amazon business LLC is one of the most overlooked but financially impactful – decisions new and scaling sellers make. While many sellers default to forming an LLC in their home state, others are drawn to popular options like Wyoming or Delaware without fully understanding the long-term compliance, tax, and operational consequences.
Choosing the right state to form your Amazon business LLC can save you thousands in taxes, fees, and compliance. If you’re just getting started with Amazon selling, begin with our Amazon Seller Guides hub to understand the full seller journey.
Before you decide on a legal structure, make sure you understand how to launch your Amazon business successfully – start with our guide on how to start selling on Amazon in 2026.
This guide cuts through the noise. Drawing on real Amazon seller use cases, state-level business regulations, and marketplace compliance realities, we break down the best states to register an Amazon LLC, when each option makes sense, and costly mistakes to avoid.
Whether you’re launching your first private-label product or scaling a multi-brand FBA operation, this article will help you make a legally sound, tax-efficient decision you won’t regret later.
Why Your LLC State Matters for Amazon Sellers
Your LLC’s state of formation affects far more than just a filing fee. It can influence:
- State income and franchise taxes
- Annual compliance and reporting costs
- Sales tax nexus exposure
- Banking and payment processor approvals
- Amazon account verification and brand trust
Amazon doesn’t require sellers to register in a specific state – but it does require consistency across your legal entity, tax identity, bank account, and Seller Central profile. Choosing the wrong state can mean duplicate filings, unnecessary taxes, or even account verification delays.
The choice between an Individual and Professional seller plan affects whether you need a business entity like an LLC. Learn the difference between account types to make the right choice.
The Home State Rule: When It’s the Best Choice
For most Amazon sellers, registering your LLC in the state where you live and operate is the safest and most compliant option.
Why your home state often wins
If you:
- Manage the business from your residence
- Store inventory at home (even temporarily)
- Operate a warehouse, office, or staff locally
… you are legally considered to be “doing business” in that state.
Registering elsewhere would still require you to file as a foreign LLC in your home state – resulting in:
- Two sets of annual fees
- Additional registered agent costs
- More complex compliance
Bottom line: If your business has a physical or operational presence in your state, forming your LLC there is usually the most cost-effective and legally sound option.
In addition to state fees and taxes, remember Amazon charges referral and fulfillment fees. See how these add up in our Amazon seller fees breakdown and calculator
Best States to Register an Amazon LLC (When You Don’t Live There)
If you operate a location-independent Amazon business (no office, no employees, no inventory at home), certain states offer structural advantages.
Below are the most seller-friendly states – and when they actually make sense.
Wyoming: Best Overall for Online-Only Amazon Sellers
Why Wyoming stands out
Wyoming has become the top choice for many U.S. Amazon sellers who run fully remote businesses.
Key advantages
- No state income tax
- No corporate income tax
- Low annual report fee (currently among the lowest in the U.S.)
- Strong privacy protections for LLC owners
- Simple compliance and maintenance
Best for:
- Amazon FBA sellers with inventory stored only in Amazon warehouses
- Digital-first eCommerce brands
- Solo founders and small teams without a home-state nexus
Watch out:
If you later create physical presence in another state (office, employees, or personal relocation), you’ll likely need to register as a foreign LLC there.
Delaware: Best for Scalable or Investment-Backed Brands
Delaware is often misunderstood. It’s not “better” for everyone – but it is powerful for the right seller.
Why sellers choose Delaware
- Highly developed business court system
- Predictable legal precedents
- Familiarity for investors and acquirers
Best for:
- Amazon brands planning to raise venture capital
- Sellers preparing for acquisition or multi-entity structures
- Larger operations with legal counsel
Downsides for small sellers
- Annual franchise tax (even with no income)
- Higher ongoing compliance costs
- Often unnecessary for early-stage Amazon sellers
Florida: Best Low-Tax Option for U.S. Residents
Florida is a strong choice for sellers who live there or plan to.
Benefits
- No personal state income tax
- Competitive LLC filing and renewal fees
- Business-friendly regulatory environment
Best for:
- Amazon sellers residing in Florida
- Lifestyle entrepreneurs and growing FBA brands
Important note
Florida is not ideal if you don’t live or operate there. Out-of-state sellers gain little advantage compared to Wyoming.
Texas: Strong for Growing Amazon Operations
Texas offers a balance of scale, logistics, and business friendliness.
Advantages
- No personal income tax
- Strong logistics infrastructure (key for FBM sellers)
- Large talent pool for operations and customer service
Considerations
Texas has a franchise tax threshold, which most small Amazon sellers won’t hit – but scaling brands should plan ahead.
Nevada: Less Attractive Than It Appears
Nevada is often marketed alongside Wyoming – but it’s usually inferior for Amazon sellers.
Why Nevada often disappoints
- Higher annual fees
- Business license requirements
- No meaningful advantage over Wyoming
In practice: Wyoming offers nearly all the same benefits at a lower cost and with less bureaucracy.
Depending on your business structure and registration state, you may need liability coverage – learn more in our Amazon seller insurance requirements explained guide
Sales Tax Nexus: The Amazon-Specific Factor Many Sellers Miss
Thanks to marketplace facilitator laws, Amazon collects and remits sales tax on your behalf in most states. However, your LLC’s state can still affect:
- State income or gross receipts taxes
- Economic nexus thresholds for off-Amazon sales
- Audit exposure as your brand grows
Your formation state should be chosen with your long-term sales channels in mind – not just Amazon.
Banking, EINs, and Amazon Verification
Amazon Seller Central, U.S. banks, and payment processors expect:
- Matching LLC name, EIN, and formation state
- A valid U.S. business address or registered agent
- Clear ownership records
States like Wyoming and Delaware are widely accepted – but mistakes in documentation are a common cause of Amazon verification delays.
As part of registration, you’ll provide legal and tax details – check our guide on required documents for Amazon seller registration so nothing catches you off guard.
Common Mistakes Amazon Sellers Make
- Forming an LLC in a popular state without understanding nexus rules
- Paying double fees by registering in the wrong state
- Choosing Delaware too early without investor needs
- Ignoring long-term compliance and exit strategy
- Assuming Amazon FBA eliminates all state obligations
So, What’s the Best State for You?
Quick decision framework:
- You live and operate in one state -> Register in your home state
- Fully remote, Amazon-only business -> Wyoming
- VC-backed or acquisition-focused brand -> Delaware
- Florida or Texas resident -> Your home state often wins
There is no universal best state only the best state for your business model.
Final Thoughts from SwanseaAirport
At SwanseaAirport, we’ve helped thousands of sellers navigate Amazon compliance, brand growth, and operational setup. LLC formation is not just a legal checkbox – it’s a strategic foundation that affects taxes, trust, and scalability.
If you treat your Amazon business like a real company from day one, choosing the right state is a decision you’ll only have to make once – and benefit from for years.
Frequently Asked Questions
Amazon Brand Registry: Complete Setup Guide
Amazon Brand Registry is no longer just a brand protection tool – it’s a strategic advantage for serious sellers and brand owners. From unlocking A+ Content and Sponsored Brand Ads to gaining control over product listings and IP protection, Brand Registry has become essential for scaling a legitimate Amazon business in the US.
If you’re starting out, begin with our Amazon Seller Guides hub to build a strategic foundation before exploring brand-level tools.

This complete setup guide explains what Amazon Brand Registry is, who qualifies, how to register step by step, common pitfalls, approval timelines, and advanced benefits – with real-world insights from working with US-based Amazon sellers and brands.
What Is Amazon Brand Registry?
Amazon Brand Registry is a program designed to help verified brand owners protect their intellectual property (IP) and gain enhanced control over how their products appear on Amazon.
Once approved, Amazon recognizes you as the authoritative source for your brand’s listings. This reduces hijacking, improves listing accuracy, and unlocks premium brand-building tools.
Key purpose:
- Protect trademarks
- Improve listing accuracy
- Empower brand growth through exclusive tools
Who Is Eligible for Amazon Brand Registry?
To qualify, you must meet all of the following requirements:
1. Registered Trademark (Mandatory)
You must own an active, registered trademark issued by a recognized trademark office.
For US sellers:
- USPTO (United States Patent and Trademark Office)
- Trademark must be LIVE, not pending (unless using IP Accelerator)
Accepted trademark formats:
- Word mark (recommended)
- Design mark (logo-based)
Expert insight: Sellers using word marks generally experience fewer Brand Registry disputes and smoother catalog control compared to logo-only marks.
2. Brand Name Appears on Products or Packaging
Amazon requires proof that your brand is:
- Permanently affixed to the product or
- Clearly printed on packaging
Amazon will request real photos, not mockups.
3. You Are the Trademark Owner or Authorized Agent
You must either:
- Own the trademark, or
- Be officially authorized by the trademark owner
If you’re an agency or distributor, Amazon may request additional verification.
Amazon Brand Registry Benefits (Beyond the Obvious)
Most guides mention brand protection. Here’s what actually matters in practice:
1. Stronger Listing Control
Brand-registered sellers gain priority in:
- Title updates
- Bullet points
- Images
- Product descriptions
This dramatically reduces listing sabotage by competitors.
2. Advanced Brand Analytics
Access Brand Analytics, including:
- Search term reports
- Market basket analysis
- Repeat purchase behavior
Strategic value: These insights can guide product expansion, pricing strategy, and PPC keyword selection – far beyond basic Seller Central data.
3. Access to Brand-Building Tools
Once approved, you can unlock:
- A+ Content (standard & premium)
- Amazon Brand Store
- Sponsored Brand Ads
- Amazon Vine (brand-supported reviews)
- Manage Your Experiments (A/B testing)
These tools are not available to non-registered brands.
4. Automated IP Protection
Brand Registry uses machine learning to:
- Proactively block suspected counterfeit listings
- Reduce manual infringement reporting
This saves time and legal costs as your catalog grows.
Before diving into Brand Registry, ensure your business is set up correctly. Our guide on how to start selling on Amazon in 2026 walks you through the basics from account setup to your first product launch.
Step-by-Step: How to Register for Amazon Brand Registry
Step 1: Prepare Your Trademark Information
Have the following ready:
- Trademark registration number
- Trademark office (USPTO)
- Exact brand name (must match trademark)
- Product category list
Brand Registry benefits are generally available to Professional sellers – learn the difference between Individual and Professional plans if you’re unsure which plan to choose.
Step 2: Log In to Amazon Brand Registry Portal
Visit Amazon Brand Registry and sign in using:
- The same Amazon account used for Seller Central (recommended) or create an Amazon seller central account
Using different accounts can delay approval or trigger verification issues.
Step 3: Submit Brand Details
You’ll enter:
- Brand name
- Trademark number
- Trademark type (word or design mark)
- Countries where your brand is manufactured and sold
Accuracy here is critical.
Step 4: Upload Product & Packaging Images
Amazon typically requires:
- Clear photos of products
- Brand name permanently visible
- Packaging photos (if applicable)
No stock renders or Photoshop mockups.
Step 5: Trademark Verification Code
Amazon sends a verification code to:
- The email associated with your trademark filing (via USPTO)
You must retrieve and submit this code within the given timeframe.
Step 6: Approval Timeline
Typical approval time:
- 2 – 10 business days (US trademarks)
If delayed, it’s usually due to:
- Trademark mismatch
- Low-quality images
- Brand name inconsistency
Common Amazon Brand Registry Mistakes (and How to Avoid Them)
Brand Name Doesn’t Match Trademark Exactly
Even small differences (spacing, punctuation) can cause rejection.
Fix: Ensure your Amazon listings and packaging match the trademark verbatim.
Using a Pending Trademark Without IP Accelerator
Amazon does not approve pending trademarks unless filed through its IP Accelerator program.
Poor Image Quality
Blurry or edited images often result in denial.
Best practice: Take real photos with a smartphone under good lighting.
Registering Too Late
Many sellers wait until hijackers appear.
Pro tip: Register before scaling ads or inventory. Prevention is cheaper than cleanup.
Many sellers stall during Brand Registry because they don’t have all verified documents ready – review our guide on required documents for Amazon seller registration for a smooth process.
Even with Brand Registry, certain categories require additional approval – see how restricted categories and gating works on Amazon
Amazon Brand Registry vs IP Accelerator (Quick Comparison)
| Feature | Brand Registry | IP Accelerator |
|---|---|---|
| Requires live trademark | Yes | No (fast-track) |
| Faster approval | No | Yes |
| Legal cost | Lower | Higher |
| Ideal for | Established brands | New brands launching fast |
Is Amazon Brand Registry Worth It?
For US-based private label sellers, the answer is yes – almost always.
If you:
- Plan to scale beyond one product
- Invest in advertising
- Care about long-term brand equity
- Want protection from hijackers
Then Brand Registry is not optional – it’s foundational.
Expert Take from SwanseaAirport
At SwanseaAirport, we’ve observed that brands enrolled in Amazon Brand Registry:
- Experience fewer listing disputes
- Convert better with A+ Content
- Scale PPC more efficiently
- Retain long-term brand value beyond Amazon
Brand Registry isn’t just a compliance step – it’s a growth multiplier when used strategically.
Final Thoughts
Amazon Brand Registry is one of the highest ROI decisions a serious Amazon seller can make. While the setup process is straightforward, success depends on accuracy, preparation, and understanding the long-term strategic benefits.
If you treat Brand Registry as a checkbox, you’ll underuse it. If you treat it as a platform for brand ownership and growth, it can define your success on Amazon.
Frequently Asked Questions
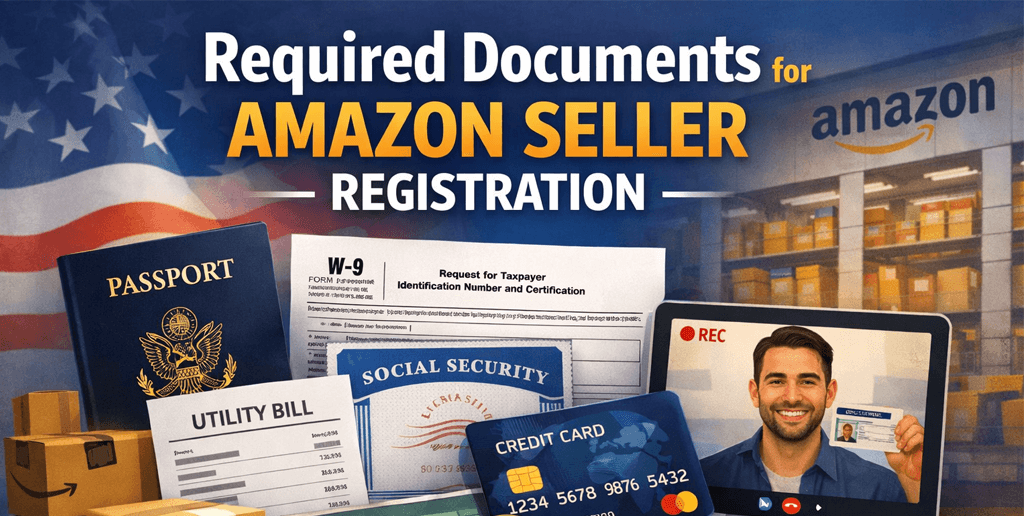
Required Documents for Amazon Seller Registration (US Sellers)
Starting an Amazon seller account in the United States is not just a formality – it’s a compliance and identity-verification process designed to protect buyers, brands, and the marketplace itself. Many new sellers get stuck or rejected not because they lack motivation, but because they submit the wrong documents, outdated files, or mismatched information.
If you’re planning to sell on Amazon, gathering your verification documents is one of the first steps. For a full beginner roadmap from setup to launch, visit our Amazon Seller Guides hub.
This guide goes beyond a basic checklist. Drawing on real seller verification patterns, Amazon policy requirements, and common suspension triggers, we’ll explain what documents Amazon actually needs, why they matter, how to prepare them correctly, and how to avoid costly delays.
Before you begin assembling paperwork, make sure you’ve reviewed our full guide on how to start selling on Amazon in 2026 – it explains the process end-to-end.
If you’re serious about building a long-term Amazon business, this is the kind of page you’ll want to bookmark.
Why Amazon Requires Seller Verification Documents
Amazon operates under strict Know Your Customer (KYC), anti-fraud, and tax compliance rules in the US. Seller documents are used to:
- Verify who you are (identity & address)
- Confirm who owns the business
- Ensure tax compliance with the IRS
- Prevent fraud, account farming, and fake businesses
This is why Amazon increasingly uses manual review, AI cross-checks, and video verification – especially for new sellers when they create an Amazon seller central account.
Insight: Most rejections happen due to inconsistency, not missing documents. A single mismatch (name format, address abbreviation, outdated statement) can delay approval by weeks.
Core Documents Required for Amazon Seller Registration (US)
Amazon requests different documents depending on whether you register as an individual or a business entity, but the following are universally required.
1. Government-Issued Photo ID
What Amazon Accepts
- US Passport (preferred)
- Driver’s License
- State-issued ID card
Requirements
- Must be valid and unexpired
- Full color scan or photo
- All four corners visible
- Name must match your Amazon account exactly
Expert Tip
Use the passport if you have one. It has fewer formatting variations than state IDs and passes verification faster.
2. Proof of Residential Address
Amazon uses this to confirm that you are a real, reachable person – not a shell account.
Accepted Documents
- Utility bill (electric, water, gas, internet)
- Bank or credit card statement
- Lease agreement (in some cases)
Key Rules
- Issued within the last 90 days
- Shows your full legal name
- Shows exact residential address
- No PO Boxes
- PDF format preferred
Common Failure Point: Address abbreviations (St. vs Street, Apt vs #) that don’t match your ID exactly.
3. Valid Credit Card
Amazon requires a chargeable credit card to:
- Verify billing identity
- Charge monthly subscription fees (Professional plan)
- Deduct selling fees
Requirements
- Visa, Mastercard, American Express
- Must support international transactions
- Must not be prepaid or virtual-only cards
Pro Insight
Avoid fintech or temporary cards. Traditional bank-issued cards have the highest approval rate. Understand about amazon seller fees breakdown and calculator to avoid credit card can’t be paid.
4. Active Bank Account (for Disbursements)
Amazon will deposit your earnings into this account.
For US Sellers
- US checking account
- Routing number (ACH-enabled)
- Account holder name must match seller or business name
Verification Note
Amazon may send micro-deposits or request a bank statement later for confirmation.
5. Tax Information (Critical for US Sellers)
Amazon is legally required to report seller income to the IRS.
Individual Sellers
- Social Security Number (SSN)
Business Sellers
- Employer Identification Number (EIN)
You’ll complete this through Amazon’s Tax Interview (W-9 form) inside Seller Central.
Mistake to Avoid: Entering placeholder or incorrect tax info will trigger account limitations later – even if your account is initially approved.
Additional Documents for Business Sellers (LLC, Corporation)
If you register as a business entity, Amazon may request:
6. Business Registration Documents
Examples:
- Articles of Organization (LLC)
- Articles of Incorporation (Corp)
- State business registration certificate
What Amazon Looks For
- Legal business name
- Registration number
- State of formation
7. Proof of Business Address (If Different)
If your business operates from a different address than your residence, Amazon may ask for:
- Utility bill in business name
- Bank statement with business address
- Commercial lease agreement
Video Verification: The New Gatekeeper
Many US sellers are now required to complete a live or recorded video verification.
What You’ll Need
- Your government ID
- Proof of address document
- Ability to speak clearly and answer basic questions
Amazon Typically Asks
- Who owns the business?
- Where are you located?
- What products do you plan to sell?
Tip: Treat this like a bank or visa interview. Calm, clear, and honest answers matter more than perfection.
Once your documents are ready, walk through the application process in our guide on creating an Amazon Seller Central account
Document Preparation Best Practices (Expert Checklist)
To maximize approval speed:
- Use original PDFs, not screenshots
- Avoid editing or redacting documents
- Ensure exact name and address consistency
- Upload documents in high resolution
- Do not reuse documents from previously suspended accounts
Once you’re registered, you’ll need to choose what to sell. Start by learning how to find your first product to sell on Amazon
Why Accounts Get Rejected (Even with All Documents)
Based on seller case patterns, rejections usually happen due to:
- Mismatched name formats
- Address inconsistencies
- Expired or low-quality documents
- Previously linked suspended accounts
- Suspicious IP or login behavior during signup
Insight: Amazon evaluates the entire registration context, not just the documents themselves.
Final Thoughts: Prepare Once, Approve Once
Amazon seller registration is no longer a simple signup – it’s a trust-based verification process. Sellers who treat it professionally from day one face fewer suspensions, faster approvals, and smoother scaling.
At SwanseaAirport, we help sellers think beyond checklists – focusing on compliance, longevity, and platform trust. Preparing your documents correctly is the first step toward a real, defensible Amazon business.
Frequently Asked Questions
How to Create an Amazon Seller Central Account 2026
Selling on Amazon starts with one critical step: creating an Amazon Seller Central account. While the signup process may look straightforward, many new sellers run into delays, rejections, or verification issues simply because they don’t understand Amazon’s requirements upfront.
If you’re new to Amazon selling, check out our Amazon Seller Guides for sellers for a complete roadmap from account setup to product launch and scaling.
At SwanseaAirport, we work with Amazon and Walmart sellers every day – reviewing tools, analyzing marketplace policies, and breaking down complex seller workflows into clear, actionable guidance. This guide goes beyond basic instructions to explain why Amazon asks for certain information, how to avoid common approval mistakes, and how to set your account up for long-term success, not just approval.
If you’re serious about building a real Amazon business in the US, this is the guide you’ll want to bookmark and reference.
What Is Amazon Seller Central?
Amazon Seller Central is Amazon’s official dashboard for third-party sellers. It’s where you manage every aspect of your Amazon business, including:
- Listing and pricing products
- Managing inventory and fulfillment (FBA or FBM)
- Running Amazon PPC ads
- Tracking sales, fees, and payouts
- Communicating with customers
- Handling returns and performance metrics
In short, Seller Central is your operating system for selling on Amazon.
Before You Create an Amazon Seller Central Account (Read This First)
Before starting your application, prepare the necessary paperwork and identity documents – errors here are the most common reason accounts get delayed or rejected. See our full checklist for required documents for Amazon seller registration
One of the biggest mistakes new sellers make is clicking “Sign up” without preparing the required information. Amazon’s identity verification process is strict – especially for US accounts – and missing or inconsistent details are the #1 reason applications get stuck.
Information You’ll Need
Prepare these before starting:
- Business information
- Legal name (individual or company)
- Business address (must match documents exactly)
- EIN (for businesses) or SSN (for individuals)
- Government-issued ID
- US passport or driver’s license
- Must be valid and clearly readable
- Chargeable credit card
- Visa or Mastercard preferred
- Must support international transactions
- US bank account
- For Amazon disbursements
- Can be a traditional bank or approved fintech provider
- Phone number
- Able to receive SMS or voice verification
Expert insight from SwanseaAirport:
Amazon cross-checks every detail – even small address formatting differences (e.g., “St.” vs “Street”) can trigger verification delays.
Step-by-Step: How to Create an Amazon Seller Central Account
Step 1: Go to Amazon Seller Central Signup
Visit Amazon Seller Central and choose “Sign up”.

You’ll be asked whether you want to sell as:
- Individual seller (no monthly fee, per-item fees apply)
- Professional seller ($39.99/month, access to advanced tools)
If you plan to sell more than ~40 items per month, Professional almost always makes financial sense. Be careful when choosing amazon seller account types: Individual vs Professional (You can upgrade or downgrade later)
Step 2: Sign In or Create an Amazon Account
You can:
- Use an existing Amazon buyer account, or
- Create a new account dedicated to your business
Best practice:
SwanseaAirport strongly recommends using a separate email for your seller account to keep personal and business activity cleanly separated.
Step 3: Enter Business & Personal Information
Amazon will ask for:
- Legal name (exactly as on your ID)
- Business address
- Date of birth
- Identity details (SSN or EIN)
This information is used for KYC (Know Your Customer) and tax compliance.
Do not guess or “clean up” details – accuracy matters more than presentation.
Step 4: Add Billing & Bank Information

- Enter your credit card for subscription and selling fees
- Add your bank account for payouts
Amazon will later send a small test deposit to confirm your bank details.
Step 5: Identity Verification (Critical Step)
Most US sellers must complete identity verification, which may include:
- Uploading a government ID
- Live video verification call
- Address verification
Behind the scenes:
Amazon uses automated risk systems. Accounts that pass verification smoothly often get access to advanced features faster, including brand tools and advertising.
Step 6: Tax Interview (IRS Compliance)
Amazon requires sellers to complete a tax interview:
- Individuals: W-9 (US sellers)
- Businesses: EIN-based tax info
This determines:
- Tax reporting
- Backup withholding requirements
Incorrect tax info can delay payouts – don’t rush this step.
Step 7: Account Approval & Dashboard Access
Once approved, you’ll land inside Seller Central, where you can:
- Create product listings
- Choose Fulfillment by Amazon (FBA) or Fulfillment by Merchant (FBM)
- Set up shipping templates
- Enable advertising
Congratulations – you’re officially an Amazon seller.
With your Seller Central account active, your next steps are product research and validation. Start with our guides on evaluating product opportunities and launching successfully on Amazon.
Common Amazon Seller Central Signup Mistakes (And How to Avoid Them)
Based on SwanseaAirport’s analysis of hundreds of seller cases:
| Mistake | Why It Happens | How to Avoid |
|---|---|---|
| Address mismatch | Formatting differences | Copy exact address from bank statement |
| Failed ID verification | Blurry or expired ID | Use high-resolution scans |
| Bank rejected | Unsupported account | Use US-based checking accounts |
| Duplicate accounts | Personal + business confusion | One account per seller |
Many sellers get unwanted surprises because their product or business setup clashes with Amazon’s policies. Learn how to navigate Amazon’s restricted categories and gating requirements to avoid early hurdles.
Individual vs Professional Seller Account (Quick Comparison)
| Feature | Individual | Professional |
|---|---|---|
| Monthly fee | $0 | $39.99 |
| Per-item fee | $0.99/item | None |
| Buy Box eligibility | Limited | Yes |
| Advertising | No | Yes |
| Bulk listings | No | Yes |
For most serious sellers, Professional is the long-term choice.
Once your account is active, you’ll start seeing referral and fulfillment fees appear in your Seller Central dashboard. It helps to understand the full fee structure before you list your first item.
Why Trust This Guide?
This guide is written and reviewed by the SwanseaAirport editorial team, a digital commerce brand focused on:
- Amazon & Walmart marketplace education
- Seller tools and product data analysis
- Practical, real-world seller workflows
We don’t just summarize Amazon documentation – we test processes, analyze seller outcomes, and translate platform policies into actionable insights that help sellers avoid costly mistakes.
Final Thoughts
Creating an Amazon Seller Central account is more than a signup form – it’s the foundation of your entire Amazon business. When done correctly, it sets you up for smoother approvals, faster scaling, and fewer compliance headaches down the road.
At SwanseaAirport, our mission is to help sellers not just start, but succeed on Amazon and Walmart with clarity, confidence, and data-backed guidance.
Frequently Asked Questions
Amazon Seller Fees Breakdown and Calculator (2026 Guide)
Selling on Amazon can be extremely profitable – but only if you fully understand Amazon seller fees before launching or scaling a product. Many new sellers fail not because of poor demand, but because they miscalculate fees and margins.
If you’re just getting started, explore our comprehensive Amazon Seller Guides hub for a roadmap from setup to growth.
This guide provides a complete, transparent breakdown of Amazon seller fees, explains how to calculate them accurately, and shows you how to use a fee calculator to forecast real profit, not guesses.
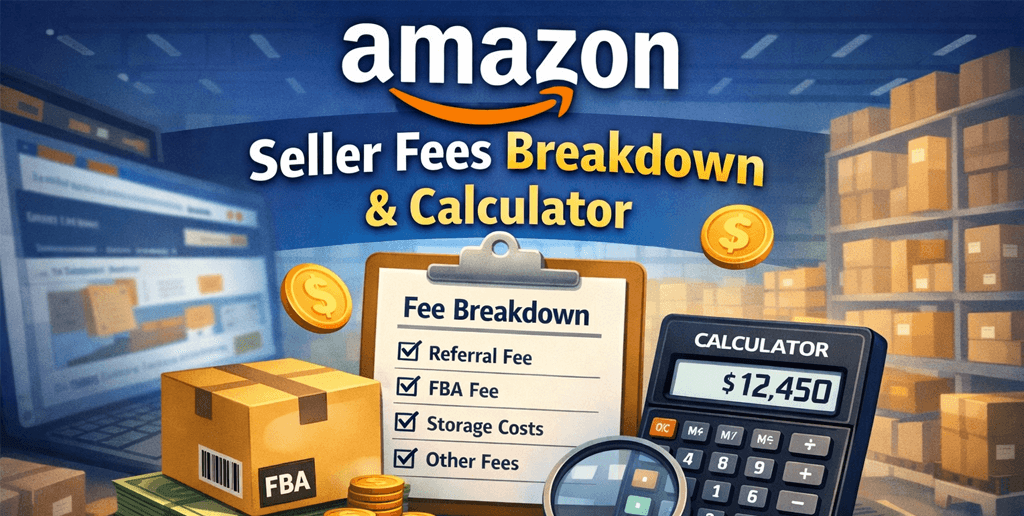
Written by SwanseaAirport, a digital commerce brand helping sellers succeed on Amazon and Walmart, this article goes beyond surface-level summaries and delivers practical, seller-tested insights you can rely on.
Why Understanding Amazon Seller Fees Matters
Amazon’s fee structure is not complicated – but it is layered. Sellers who focus only on referral fees or FBA costs often miss:
- Hidden fulfillment surcharges
- Category-specific commission differences
- Storage and long-term inventory penalties
- Advertising costs that quietly erode margins
Insight: Most unprofitable Amazon listings fail at the planning stage, not the execution stage.
If you want a product you can confidently scale, you must calculate true landed cost + Amazon fees + ad spend before you source inventory. Before you worry about fees, make sure you know how to launch your Amazon business properly
Overview of Amazon Seller Fees
Amazon fees generally fall into six main categories:
- Seller account fees
- Referral (commission) fees
- Fulfillment fees (FBA or FBM)
- Storage fees
- Additional service & penalty fees
- Advertising fees (optional but realistic)
We’ll break each down in detail.
1. Amazon Seller Account Fees
Amazon offers two seller account types in the US:
Individual Plan
- $0 monthly fee
- $0.99 per item sold
- Best for sellers testing the platform or selling fewer than 40 items/month
Professional Plan
- $39.99/month
- No per-item fee
- Required for:
- Sponsored ads
- Brand Registry
- Advanced analytics
- Scaling beyond casual selling
Expert Tip: If you plan to sell even 50 units/month, the Professional plan is already cheaper.
2. Amazon Referral Fees (Commission)
Amazon charges a referral fee on every sale, calculated as a percentage of the product’s sale price (including shipping).
Typical Referral Fees (US)
| Category | Referral Fee |
|---|---|
| Most categories | 15% |
| Electronics | 8% – 15% |
| Apparel & Accessories | 17% |
| Beauty | 8% – 15% |
| Grocery | 8% – 15% |
Original Insight: A 2 – 3% difference in referral fees can completely change whether a product is viable at competitive pricing.
Always verify your exact category fee inside Seller Central before sourcing. You can see all fee charges and reports inside your Seller Central dashboard
3. Fulfillment Fees: FBA vs FBM
Fulfillment by Amazon (FBA)
With FBA, Amazon handles:
- Storage
- Picking & packing
- Shipping
- Customer service
- Returns
FBA fees depend on:
- Product size tier
- Shipping weight
- Time of year (peak vs off-peak)
Example (Standard-size product, ~1 lb):
- Fulfillment fee: $3.22 – $4.30 per unit (varies by year & tier)
Insight: Amazon FBA fees increase gradually every year – pricing products with thin margins is risky long-term.
Fulfillment by Merchant (FBM)
With FBM:
- You handle storage, shipping, and returns
- Amazon still charges referral fees
- Shipping costs vary by carrier and speed
FBM can be cheaper for:
- Oversized items
- Slow-moving inventory
- Sellers with strong logistics systems
Reality Check: FBM looks cheaper on paper but often loses Buy Box eligibility, reducing conversion rates.
Fulfillment options influence your fee structure significantly, particularly when comparing FBA with self-fulfillment
4. Amazon Storage Fees (Often Overlooked)
Amazon charges monthly storage fees based on:
- Cubic feet
- Season (Q4 is more expensive)
Typical Monthly Storage Fees (US)
| Period | Standard-size |
|---|---|
| Jan – Sep | ~$0.87/cu ft |
| Oct – Dec | ~$2.40/cu ft |
Long-Term Storage Fees
- Charged after 365 days
- Can exceed the product’s retail price
Expert Advice: Inventory age is a silent profit killer. Storage fees punish poor forecasting more than bad ads.
5. Additional Amazon Fees to Watch For
These fees don’t apply to every seller – but when they do, they hurt.
- Returns processing fees (certain categories)
- Removal & disposal fees
- Aged inventory surcharge
- Inbound placement fees
- Prep & labeling fees
Original Insight: Sellers who rely only on Amazon’s default replenishment suggestions often overstock – and pay for it later.
6. Amazon Advertising Costs (Not a Fee, but Real)
While optional, Amazon PPC is unavoidable in competitive categories.
Typical ad spend:
- 5% – 15% of revenue (sometimes more for launches)
Important: Any fee calculator that ignores ad spend is not showing true profit.
Amazon Seller Fee Calculator: How to Calculate Profit Correctly
Basic Profit Formula
Selling Price
– Referral Fee
– FBA/FBM Fulfillment Fee
– Storage Fees
– Product Cost
– Shipping to Amazon
– Advertising Cost
= Net Profit
Realistic Margin Targets (US Market)
| Seller Stage | Target Net Margin |
|---|---|
| Beginner | 25 – 30% |
| Scaling | 30 – 40% |
| Brand-led | 40 % + |
Expert Rule: If your product can’t hit 30% net margin on paper, don’t launch it. Some products are easier to profit from once you know where costs come from.
Common Fee Calculation Mistakes Sellers Make
- Ignoring ad costs during research
- Assuming referral fees are always 15%
- Forgetting Q4 storage increases
- Underestimating returns
- Pricing too close to competitors with better fee efficiency
These mistakes compound and usually show up after inventory is stuck in FBA.
Why Trust SwanseaAirport?
This guide is written and reviewed by SwanseaAirport, a digital commerce brand dedicated to helping sellers succeed on Amazon and Walmart marketplaces through:
- In-depth fee analysis
- Product research frameworks
- Platform-specific strategies
- Practical seller tools and calculators
Our content is built from real marketplace data, seller experience, and ongoing platform changes, not generic summaries.
This is the type of resource we’d expect to see referenced in a business handbook or eCommerce textbook – and one sellers bookmark before spending their first dollar.
Final Thoughts: Fees Decide Profit Before You Launch
Amazon seller fees are not something you “figure out later”. They determine:
- Whether your product is viable
- How aggressively you can advertise
- If you can survive price competition
The most successful sellers don’t guess – they calculate everything upfront.
If you want more step-by-step guidance:
- Product selection
- Fee modeling
- Launch strategy
- Scaling sustainably
Explore more expert resources on SwanseaAirport.